> For the complete documentation index, see [llms.txt](https://gemautomate.gitbook.io/manual/llms.txt). Markdown versions of documentation pages are available by appending `.md` to page URLs; this page is available as [Markdown](https://gemautomate.gitbook.io/manual/general/troubleshooting-and-faqs.md).
# Troubleshooting & FAQs
GemAutomate Browser and Phone
Defining Variables, Assigning Values, and Usage
Use the **`Insert Data`** block to save data by specifying the variable name and its value.
To call a variable, enclose it within double curly braces `{{ }}`\
Start by specifying the data type (i.e., variable or variables), followed by a dot and the variable name.
* **Example:**
* **Input:** `{{variables.Name}}`
* **Output:** `GemAutomate`
How do the two programs differ in their functionality?
**GemAutomate Phone**: Uses a computer to automate tasks on Android mobile devices. \
It supports managing multiple accounts simultaneously and is ideal for automating games or social media applications.\
**GemAutomate Browser**: Uses a computer to automate tasks through a web browser. \
It supports various online platforms including Instagram, Facebook, and TikTok.
How to backup and export profiles data
* Select the profile
* Go to `Actions` then `Backup`
* Select the storage location, then click on `Export`
How to Import profiles data
* Go to `Actions` then `Backup`
* Click on **`Import`** then **`Select the ZIP file`**
* Select the file you backed up, then click on `Import`
How to Change Accessed Device
* Please follow instructions on [**Change Accessed Device**](/manual/manual/change-accessed-device.md)
***
GemAutomate Browser : Defining Position or Adding a CSS Selector
**Target Element Requirement:**\
Every action block must include a target element. This is equivalent to defining the location where the script will operate (e.g., clicking or typing). You must specify the position of the component on the webpage every time.
Click the button to choose the desired element position. The element’s ID will be displayed in the browser.
Click at the desired position with the mouse. The ID will appear in the designated field. \
Then, copy the ID and paste it in.
GemAutomate Browser : Creating Multiple Profiles
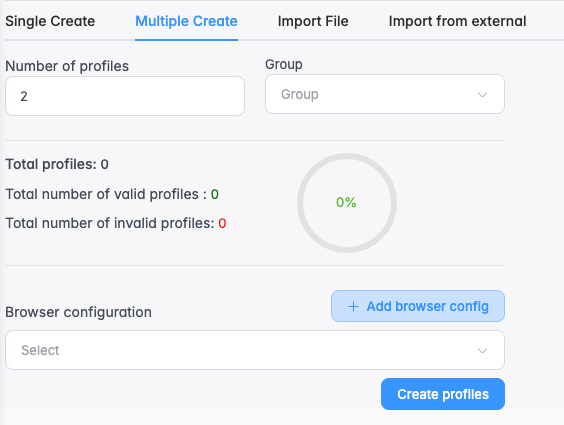
Click the **Create Profile** button, then navigate to the **Multiple Profile** page.
Set up the Browser Config and assign a name by selecting and specifying the OS or User Agent.
* For example, name it "Linux" if you have selected Linux as the OS and opted for a random User Agent.
then scroll down and select 'OK'
After configuration, select the number of profiles you wish to create, click **Create profiles**, and then return to the profile page.
GemAutomate Browser : Adding Proxy for Multiple Profiles
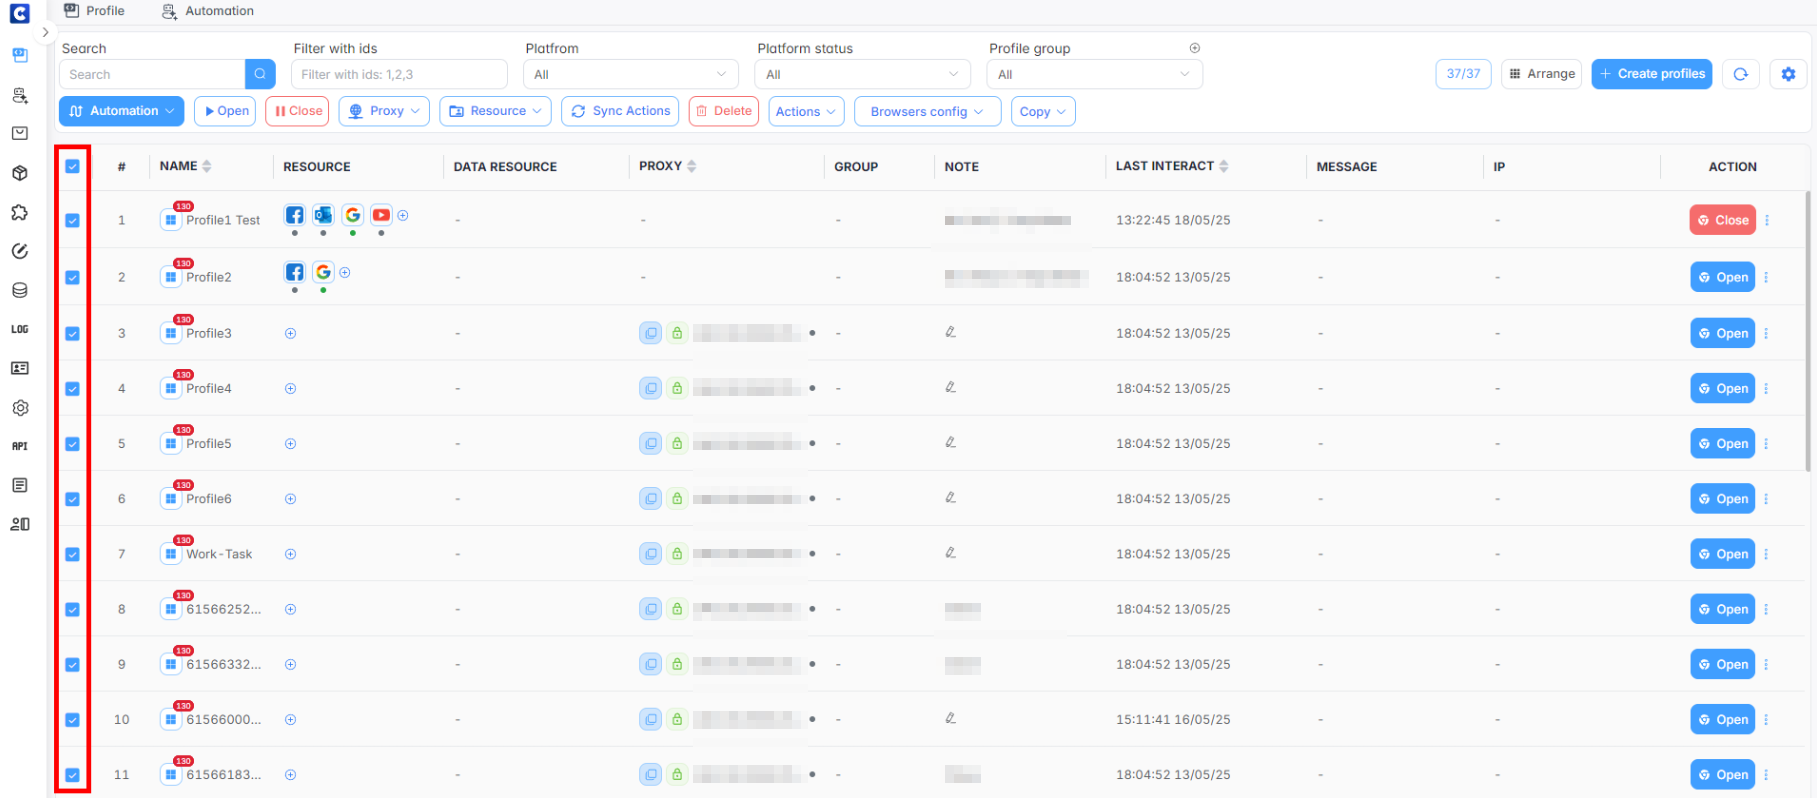
Choose all the profiles corresponding to the desired number (using one profile per proxy)
Proxy data >> Import proxy
Enter the proxy information (one proxy per line)
Once the data is successfully entered, the proxy number will appear on the profile page. If unsuccessful, re-check the data to ensure it complies with the defined format.
***
GemAutomate Phone: How to connect Android Phone and Box Phone
**Enable USB Debugging on Android**
1. Open **Settings** on your Android device
2. Go to **About phone**
3. Tap **Build number** 7 times to unlock **Developer options**
4. Go back to **Settings > Developer options**
5. Enable **USB Debugging**
***
#### Connect your phone to your computer via USB
* The first time you connect, a message will pop up on your phone:\
**"Allow USB debugging?"**
* Tap **Allow** to confirm.
GemAutomate Phone: Defining Position or Adding Xpath
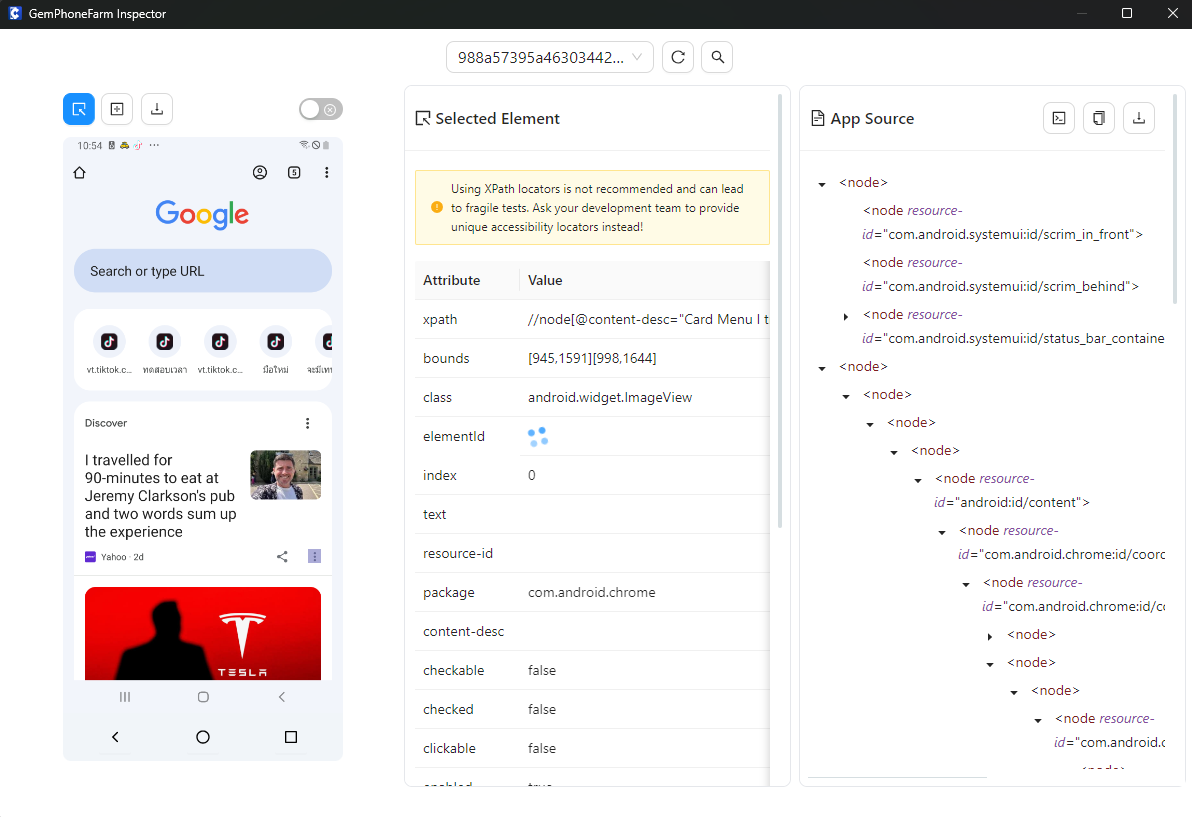
**Inspector** is a function that allows you to access information about packages and application elements on the screen,\
enabling you to write and develop **automation** more effectively.
* **Select Devices**\
Displays a list of devices connected to **GemAutomate Phone**. You can select the device you want to use from this field.
* **Reload**\
Reloads the device interface after any actions have been performed on the screen.
* **Search for element**\
Search for an element using **ID**, **XPath**, **Name**, or **Class Name**.